The Most Common Diecast Problems
Diecast model cars, while built to last, can encounter various issues over time. Understanding these common problems is the first step in effective repair. From paint damage and part breakage to mechanical failures, knowing what to expect allows collectors and enthusiasts to proactively address issues and maintain their cherished models. Proper care and timely repairs not only preserve the aesthetic value of the models but also ensure their longevity, allowing them to be enjoyed for years to come. Many diecast models are family heirlooms, so knowing how to care for them is important. This section will cover the most frequent issues faced by diecast owners, equipping you with the knowledge to diagnose and tackle these problems head-on.
Paint Issues and How to Fix Them
Paint damage is perhaps the most visible and common problem. Scratches, chips, and fading can detract from the model’s appearance. The good news is that many paint issues are repairable with the right approach. Mild scratches can often be buffed out, while deeper chips may require touch-up paint. Fading can sometimes be mitigated with careful cleaning and polishing. Matching the original paint is crucial for a seamless repair, so research the model’s specific colors. Always test any repair on a small, inconspicuous area first. Take your time, and apply thin coats of paint to avoid a buildup that looks unnatural. With patience and the right materials, you can restore the paint’s original luster, making your diecast models look as good as new. Regular cleaning and proper storage can also help prevent future paint damage.
Minor Scratches and Surface Damage

For minor scratches, the approach is often quite simple. A soft cloth and a gentle polishing compound specifically designed for model cars can work wonders. Apply a small amount of the compound to the affected area and gently rub in a circular motion. Be careful not to apply too much pressure, as this can damage the paint further. After polishing, wipe away any residue with a clean cloth. For surface damage like very light abrasions, this method should be sufficient. If the scratches are slightly deeper, consider using a fine-grit polishing stick to smooth out the area before applying the polishing compound. Always ensure that the area is clean and free of dust or debris before starting the process. Regular maintenance and careful handling are key to minimizing surface damage on your prized diecast models. The key is to be patient and work in small, deliberate steps.
Restoring Paint with a Gentle Touch
When dealing with more significant paint damage, such as chips or areas where the paint has flaked off, a more involved approach is needed. Start by carefully cleaning the damaged area to remove any loose paint or debris. Then, you’ll need to find a matching paint color. If the original paint is still available, use that. If not, try to find an appropriate match using online color charts or by comparing it to existing paint colors. Apply the paint in thin, even layers, allowing each layer to dry completely before applying the next. Use a fine-tipped brush or a toothpick for precision. Once the paint is dry, consider applying a clear coat to protect the finish. This gentle touch, combined with patience, will help restore the model’s original beauty. Remember, the goal is to blend the repair seamlessly with the existing paint, making the damage virtually invisible.
Part Replacement The Easy Guide
Parts can sometimes break or go missing, especially if the model is older or has been handled frequently. Fortunately, replacing broken parts is often a manageable task. This section offers a guide to finding and fitting replacements. Whether it’s a missing wheel, a broken mirror, or a damaged engine component, knowing how to source and install these parts can breathe new life into your model cars. This not only restores their functionality and aesthetics but also helps preserve the collectible value of your models. With the right resources and a bit of know-how, you can effectively address broken or missing parts, ensuring your diecast models remain in top condition.
Finding the Right Spares

The first step in part replacement is to locate the right spares. Several options are available. Online marketplaces like eBay often have a vast selection of replacement parts, but you need to be specific with the model number. Specialized diecast model shops may also carry spare parts. Consider joining online communities or forums dedicated to diecast collecting, as members often trade or sell parts. Before purchasing, ensure that the part is a genuine match for your model. Pay close attention to the scale, manufacturer, and specific model details. If you have the original packaging, it can provide crucial information. Taking your time during this step can save you time and effort in the long run. Careful research is essential to ensure you get the right part.
Replacing Wheels and Tires
Wheels and tires are frequently damaged or lost. Replacing them involves a few straightforward steps. First, remove the old wheel. This may involve gently prying it off or unscrewing it, depending on the model’s design. Next, carefully fit the new wheel onto the axle. You may need to use a small amount of glue to secure the wheel. Make sure the wheel spins freely and doesn’t rub against the body of the car. If the tire is separate from the wheel, make sure it is correctly mounted and aligned. Test the model on a flat surface to ensure the wheels are properly aligned and the car rolls smoothly. Replacing wheels and tires can dramatically improve the appearance and playability of your diecast model. Proper alignment is key to ensuring that your model rolls as intended.
Mechanical Issues: Engine and Steering
Beyond cosmetic issues, mechanical problems can also affect your diecast models. Engine and steering components are particularly prone to problems. These issues can range from loose screws and malfunctioning steering mechanisms to more complex problems within the engine itself. Addressing these mechanical issues requires a methodical approach. Careful disassembly, inspection, and the correct use of tools are critical. While some mechanical repairs are best left to specialists, many common issues can be resolved with the right knowledge and patience. Restoring the mechanical functionality of your model car adds another layer of enjoyment, allowing you to appreciate the intricate engineering behind these miniature replicas.
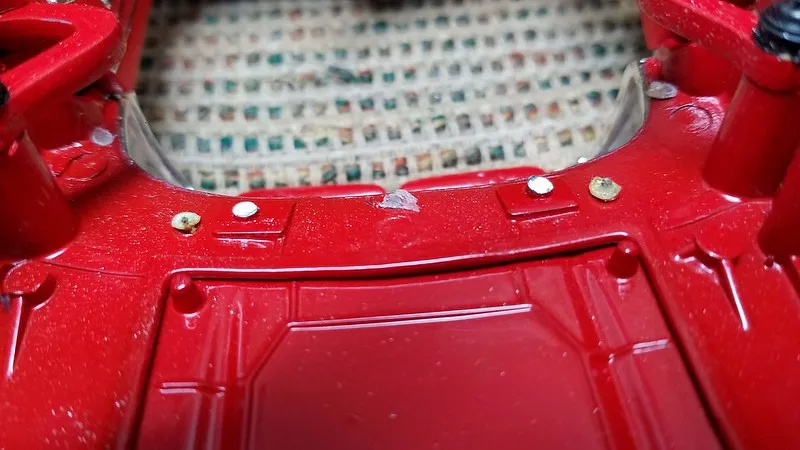
Addressing Loose Screws and Assembly Problems

Loose screws are a common culprit behind many mechanical issues. Over time, vibrations and handling can cause screws to loosen, leading to parts falling off or malfunctioning. The simplest solution is to tighten these screws. Use the correct size screwdriver and avoid over-tightening, which can strip the threads. If the screw holes are stripped, you may need to use a small amount of glue or replace the screws with slightly larger ones. For more complex assembly problems, such as misaligned parts, carefully disassemble the model and reassemble it, ensuring that all parts are correctly aligned. Consult online guides or forums for specific model repair advice. Addressing these assembly issues can often resolve a variety of mechanical problems.
Cleaning and Lubrication for Optimal Performance
Regular cleaning and lubrication are vital for maintaining optimal mechanical performance. Dust, debris, and dried lubricants can hinder the smooth operation of moving parts. Use a soft brush or compressed air to remove dust and debris from the engine and steering components. Apply a small amount of lubricant, such as silicone oil, to moving parts, such as axles and gears. Avoid using oil-based lubricants, as they can attract dirt and grime. Be careful not to over-lubricate, as this can cause mess. With these simple maintenance steps, you can ensure your model cars operate smoothly and last longer. Regular maintenance can help prevent many common mechanical problems.
Advanced Diecast Repair Techniques
As you become more comfortable with diecast repair, you can delve into more advanced techniques. This section covers some of the skills and methods used by experienced restorers. These techniques will enable you to tackle more challenging repairs, from gluing broken parts to metal restoration. While these techniques may require more specialized tools and experience, they can significantly expand your repair capabilities. Mastering these methods will allow you to restore even the most damaged models. Remember that practice is key to developing these advanced skills, so start with less-valuable models and gradually work your way up to the more precious ones.
Gluing and Bonding Broken Parts

Broken parts are inevitable, especially in older or well-used models. Gluing and bonding techniques are essential for repairing these breakages. The choice of adhesive depends on the materials being bonded. Cyanoacrylate glue (super glue) is a good general-purpose adhesive, while epoxy is stronger and more durable. When using glue, ensure that the surfaces are clean and free of debris. Apply a small amount of glue and hold the parts together firmly until the glue sets. For more complex repairs, consider using clamps to hold the parts in place. Allow the glue to cure completely before handling the model. Correct gluing can restore the structural integrity of your model cars, and the use of the correct glue is important.
Using Epoxy and Super Glue Effectively
Epoxy and super glue are indispensable tools for diecast repair. Epoxy provides a strong, durable bond, making it ideal for structural repairs. Super glue (cyanoacrylate) is fast-setting and works well for smaller parts and minor repairs. When using epoxy, carefully mix the two components according to the manufacturer’s instructions. Apply the epoxy to the broken parts, and clamp them together until the epoxy cures. For super glue, use a very small amount, as it can spread quickly. Use a toothpick or a similar tool to apply the glue with precision. Both epoxy and super glue can bond a wide range of materials. Always work in a well-ventilated area and wear gloves to protect your skin. Choose the adhesive that suits the specific repair to ensure the best results.
Metal Restoration and Polishing
Metal parts, such as bumpers, grilles, and chassis, can be affected by rust and corrosion. Metal restoration involves removing the corrosion and restoring the metal’s original shine. Start by carefully removing any loose rust using a wire brush or abrasive pad. For more severe corrosion, consider using a rust remover. Once the rust is removed, polish the metal using a polishing compound. Use a polishing wheel or a soft cloth, and apply the compound in a circular motion. This will help restore the metal’s luster. Metal restoration is a rewarding but time-consuming process. Protect the restored metal with a wax coating to help prevent future corrosion and damage. The results can significantly enhance the appearance of your diecast models.
Removing Rust and Corrosion

Rust and corrosion can be the enemy of diecast models, especially if the models have been stored improperly or exposed to moisture. Removing rust and corrosion involves several steps. Start by assessing the severity of the corrosion. For light surface rust, you can often use a wire brush or fine steel wool. For more severe corrosion, you may need to use a chemical rust remover. These removers work by dissolving the rust, leaving the metal surface clean. After using a rust remover, thoroughly rinse the part and dry it completely. Consider applying a metal protectant or a clear coat to prevent future corrosion. Patience and care are essential. Removing rust and corrosion can significantly improve the appearance and value of your model cars.
Tools You’ll Need
Having the right tools is crucial for successful diecast repair. While you don’t need a vast workshop, a few essential tools will make the process much easier. This section lists the tools you’ll need to undertake repairs and maintenance. Investing in these tools will not only make your repair efforts easier but also enhance your ability to handle a wider range of repair tasks. With the right tools, you’ll be well-equipped to tackle most diecast repair challenges. Before you start any repairs, gather the necessary tools and ensure they are in good condition. Taking the time to assemble the right equipment will help guarantee better results.
Essential Tools for Diecast Repair
A basic toolkit should include a variety of screwdrivers (Phillips head and flathead), tweezers, a hobby knife, and a small hammer. Small files and sanding sticks can be helpful for cleaning and smoothing surfaces. A magnifying glass can be invaluable for detailed work. A well-lit workspace is essential. Other useful tools include a pin vise for drilling small holes and a set of calipers for measuring parts. When choosing tools, consider quality. Higher-quality tools will last longer and perform better. As your skills grow, you can add more specialized tools to your collection. With these essential tools, you’ll be well-prepared to handle a range of diecast repair tasks.
Choosing the Right Screwdrivers

Screwdrivers are among the most essential tools. You’ll need a range of sizes and types, including Phillips head and flathead screwdrivers. A set of jeweler’s screwdrivers is especially helpful for working on small models. Make sure the screwdrivers are properly sized to fit the screws. Using the wrong size can strip the screw heads. Consider investing in a screwdriver with interchangeable bits. This will give you a wider range of options. When working on diecast models, avoid using excessive force. Choose screwdrivers with comfortable handles to prevent hand fatigue. Proper screwdriver selection is critical for disassembly, repair, and reassembly.
The Importance of Tweezers and Magnifying Glasses
Tweezers and magnifying glasses are indispensable for working with small parts. Tweezers make it easier to handle tiny components, such as screws, springs, and decals. Choose tweezers with fine points for precision. A magnifying glass or a magnifying visor will help you see the details more clearly. This is especially useful when working on intricate parts or when examining damage. If you have trouble seeing small details, consider using a magnifying lamp, which provides both magnification and illumination. These tools significantly enhance your ability to work on diecast models. Using tweezers and magnifying glasses reduces the risk of damaging the model during repair.