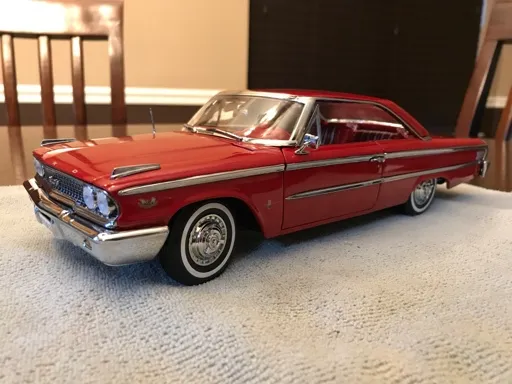
Understanding the Basics of Repainting Diecast Cars
Repainting diecast cars is a rewarding hobby that allows you to restore, customize, and personalize your miniature vehicles. Whether you’re looking to fix a damaged model, create a unique design, or simply enjoy the process of crafting, repainting offers a creative outlet and a chance to bring your vision to life. This comprehensive guide will walk you through every step, from understanding the fundamentals to troubleshooting common issues, ensuring your repainting projects are successful and enjoyable.
Why Repaint Your Diecast Cars
There are numerous reasons why you might choose to repaint your diecast cars. Perhaps you have a cherished model that has seen better days, with chipped paint or faded decals. Or maybe you want to transform a common model into a unique, one-of-a-kind creation. Repainting diecast cars also provides an excellent opportunity to learn new skills, experiment with colors and designs, and connect with other enthusiasts in the model car community. The possibilities are endless, limited only by your imagination and willingness to learn.
Benefits of Repainting

Repainting offers several benefits. Firstly, it can significantly enhance the appearance and value of your diecast models. A fresh coat of paint can erase imperfections, making an old model look brand new. Secondly, repainting allows for personalization. You can choose colors, designs, and details that reflect your individual style and preferences. Lastly, repainting is a cost-effective way to breathe new life into your collection, saving you money compared to buying new, custom-painted models. This approach provides a unique way to preserve memories and heritage of your favorite collectibles.
Common Issues and Solutions
Before you begin, it’s important to be aware of common issues. These include paint chipping, incorrect color matching, and surface imperfections. Solutions involve careful preparation, proper paint selection, and the use of quality tools. Understanding these potential problems will help you plan ahead and prevent them, resulting in a better final product. For instance, preparing the surface is crucial to remove existing paint. Likewise, understanding the paint you are going to use will help prevent chipping or imperfections in the final step.
Essential Tools and Materials Needed
To successfully repaint your diecast cars, you’ll need a variety of tools and materials. Investing in quality supplies will make the process smoother and produce superior results. This section outlines everything you’ll need to get started, from preparing the surface to applying the final coat of paint. Having the right equipment will make your hobby easier and much more satisfying.
Surface Preparation Tools

Surface preparation is the most important step in repainting diecast cars. This requires a selection of tools designed to remove old paint and create a smooth surface for the new coat. These tools include fine-grit sandpaper (various grades), hobby knives, and a suitable abrasive, which ensures the new paint adheres well. Additionally, you may need a pin to remove small parts from the diecast. Proper surface preparation will result in a professional-looking finish. You can find kits on the market which will help you with this process.
Painting Supplies
Selecting the right paints and supplies is crucial. Acrylic model paints are ideal because they are durable, easy to apply, and come in a wide range of colors. You’ll also need a high-quality primer to ensure the paint adheres correctly, as well as a clear coat to protect the finish and add shine. Other useful items include paintbrushes, airbrushes (for a smoother finish), and paint thinners. Always test your paints on a scrap piece of material to make sure you are satisfied with the results before applying to the main diecast.
Protective Gear
Safety should always be a top priority. Protective gear includes a respirator or mask to protect you from paint fumes, gloves to keep paint off your hands, and eye protection to prevent paint from getting into your eyes. A well-ventilated workspace is also essential. Ensure that you’re working in a space with adequate airflow. These precautions will ensure you stay safe and healthy while enjoying your hobby. Also, make sure to wear old clothes or a protective apron to avoid any accidental paint stains.
Step-by-Step Guide to Repainting

With the right tools and materials, the process of repainting diecast cars becomes manageable and enjoyable. This section breaks down the repainting process into easy-to-follow steps, ensuring a professional-looking finish. Following this step-by-step guide will help you avoid common mistakes and achieve amazing results.
Disassembly and Cleaning
Start by carefully disassembling your diecast car. Remove the wheels, windows, and any other parts that can be detached. Use a small screwdriver or hobby knife if needed. Next, clean the car thoroughly with soapy water to remove any dirt or grease. This step is crucial for proper paint adhesion. Once everything is disassembled and cleaned, let all parts dry completely before moving to the next step. This may take several hours.
Sanding and Priming
Once the diecast car is clean, gently sand the entire surface to remove the old paint. Start with a coarser grit sandpaper and move to finer grits. This creates a rough surface for the primer to adhere to. After sanding, wipe the car clean with a tack cloth to remove any dust. Apply a thin, even coat of primer. Let the primer dry completely according to the manufacturer’s instructions. This will provide a base for your new paint job. Remember to check the car’s paint once more to ensure that everything is even.
Applying the Base Coat

Now comes the fun part: applying the base coat. Choose your desired color and apply it in thin, even coats. Several thin coats are better than one thick coat, as this prevents drips and runs. Allow each coat to dry completely before applying the next. Use an airbrush for a smoother finish if possible. Once the base coat is dry, you can start adding details and designs. Proper technique is important for a professional finish; practice your technique before attempting to repaint your prized model.
Adding Details and Decals
This is where you can get creative. Use fine-tipped paintbrushes or specialized pens to add details like stripes, logos, and other designs. If you are using decals, carefully apply them to the surface, ensuring there are no air bubbles. Once the details and decals are in place, let everything dry completely. It is important to be meticulous, so you don’t have to repaint or fix any unwanted mistakes. Your model should look great before moving to the final step.
Clear Coating and Finishing
To protect your paint job and give it a professional finish, apply a clear coat. Apply the clear coat in thin, even layers, allowing each layer to dry before applying the next. Once the clear coat is dry, you can reassemble the car. If desired, you can polish the clear coat for added shine. Reassemble the car, and you’re done! You now have a beautifully repainted diecast car ready to display or add to your collection. Always make sure the clear coat is fully dried before reassembling.
Troubleshooting Common Repainting Problems

Even with careful planning, problems can occur. This section helps you troubleshoot common issues and provides solutions to get your project back on track. Understanding these problems and how to fix them will help you prevent setbacks and ensure your final result is perfect.
Paint Runs and Imperfections
Paint runs and imperfections are common when the paint is applied too thick. To fix this, allow the paint to dry completely, then gently sand the area with fine-grit sandpaper. Reapply the paint in thinner coats. Avoid applying thick coats of paint to prevent these types of problems. Furthermore, it’s always a good idea to have some extra material for testing and experimenting. Always try to test your painting technique before applying it to the model.
Dust and Debris
Dust and debris can ruin a paint job. Always work in a clean, dust-free environment. If dust particles appear in the paint, let the paint dry completely, then gently sand the area and reapply paint. Use a tack cloth to remove any dust before applying the clear coat. The most important aspect of this step is to ensure there is no dust and debris prior to the final step. It will ruin the complete process and take more time to repair.
Color Matching Challenges

Color matching can be tricky. If you’re trying to match an existing color, take the car to a paint store and have them scan the color. Otherwise, practice mixing colors beforehand to achieve the desired shade. Always test your paint mixture on a small, hidden area before applying it to the entire model. Furthermore, you can use color charts and resources available online to help with this process. Color matching can be one of the most difficult steps in this process.
Maintaining and Preserving Your Repainted Cars
Once you’ve put in the effort to repaint your diecast cars, it’s important to maintain them and preserve your work. This section provides tips on how to store and care for your repainted models to keep them looking their best for years to come.
Proper Storage
Store your repainted cars in a cool, dry place away from direct sunlight. This helps prevent the paint from fading or deteriorating. Consider using display cases to protect your models from dust and damage. Avoid storing them in areas with extreme temperatures or humidity, as this can also damage the paint. Keep in mind that appropriate storage is critical for the preservation of your models. Display cases are a great way to showcase your collection.
Cleaning and Care

When cleaning your repainted cars, use a soft cloth and gentle soap and water. Avoid using harsh chemicals or abrasive cleaners. Gently wipe the surface to remove dust and dirt. Handle your models carefully to prevent scratches or damage. Regular cleaning and gentle care will keep your models looking pristine. You can use a small, soft brush to reach hard-to-reach areas, like the small cracks and details.
Repainting diecast cars is a fun and rewarding hobby. By following this guide, you can transform your models and create unique pieces for your collection. With practice and patience, you’ll master the techniques and enjoy the process of bringing your creative visions to life. So, gather your supplies, follow the steps, and have fun repainting your diecast cars!